Cask Care - Vertical

How to take perfect care of our beer (and keep it on top form)

Stillaging and extraction of the beer can be done horizontally (our preferred method) or vertically.

Here we are going to look at vertical stillaging.

DOWNLOAD OUR CASK CARE BROCHURE

HOW TO STILLAGE HORIZONTALLY

Vertical – Stillaging

Remember, it’s likely that this beer has just been bounced around on a waggon before being delivered and then dropped into the cellar. The key processes now are to let it cool and settle down.

If the beer has to be stored somewhere other than where it will be dispensed, for more than 24 hours, we recommend giving the cask a gentle roll to redistribute the contents before moving to your chocks.

Position the cask where it is going to stay. Using chocks to tilt the cask, position the keystone at the high side so it is over the carbon dioxide in the cask. This will also position the sediment away from the extraction point.

If the beer has entered the cellar straight from the waggon, it takes 1 hour per gallon to cool to cellar temperature (more if warm on entry). For our beers, we recommend you let them settle and cool for at least 5 hours, ideally a bit more, but no more than 24.

If you open the cask before 5 hours, you will lose too much of the carbon dioxide which needs to absorb back into the beer to give it that lively carbonation.

Vertical – Tapping

When the beer is settled and cooled, it is ready to be tapped and vented.

Remember to clean the keystone with warm water to remove any dirt and dry it before you insert the tap.

We essentially tap and vent the beer at the same time by driving the extractor rod tap into the keystone (remember the tap must also be clean so as not to contaminate the beer).

Make sure to drive this tap in with the valve facing inwards so it can’t get caught or damaged on the edge of the cask.

In the next part. we use the valve on the tap to vent the beer.

Vertical – Venting

After driving in the tap, we vent using the valve on the side and leave open for 48 hours.

Venting allows the excess carbon dioxide out. This process removes the pressure in the cask allowing the yeast the space to continue its secondary fermentation and conditioning the beer so it’s ready to serve.

You may have heard the fizz as the tap went in, now we slowly open the venting valve to release the pressure of that initial carbon dioxide.

Leave the valve open at this point. After 48 hours, close the vent and leave the beer for a further 6 hours.

Vertical – Conditioning

Check the beer every 6 hours until fermentation and conditioning are complete.

After 6 hours, open the valve to check if there is still a hiss of carbon dioxide which would mean the beer is still conditioning.

Continue this process every 6 hours until there is no hiss of carbon dioxide being released, this means the beer is conditioned.

Once conditioned, close the vent. The beer is now ready to be connected and go on sale.

Ten Day Rule: Once conditioned, beer can be left sealed for up to 10 days before it needs to go on sale (remember it must always be sold within its best before date).

Next we remove the blanking cap where the extraction kit will be inserted and insert our extraction rod or flexible extractor (again, making sure the equipment is clean).

With the extraction rod, ensure you position the end of the rod just above where we expect the sediment to settle, which should be about 2–3 centimetres from the bottom, roughly
a thumb's width.

Pre-Trading Session Sampling & Connection

Now that our beer has been fully conditioned and held until you are happy with it, we are ready to get it on sale.

First we need to do a quick test of the beer at the cask to ensure the clarity, aroma and taste are perfect for our customers to enjoy.

For a vertical cask siphon the beer using a sampler.

If you are happy with the beer, you can now connect it to the ale line.

Check the line is clean and connect it (if you haven’t already got one, we suggest adding a hop filter to ensure no solid particles can enter the line, which can cause bacteria to grow).

During Sale – Vertical Extraction

These are vital steps for those using vertical extraction.

With a vertical cask we must open the valve whilst the beer is on sale.

If you don’t open the valve, you are creating a vacuum and the beer won’t come out at the handpull.

Again, at the end of day 1 or when the cask is 2/3rds full, we must remove our chocks and position them on the opposite side of the cask to maximise the extraction of all the conditioned beer.

Before & After Every Trading Session

Before the beer goes on sale, we recommend doing a final check to ensure everything is in order.

Remember to test the beer at the cask and at the pump before each trading session.

Your beer lines and glassware should be nice and clean. Pour the beer into a clean glass and sample again. What we are looking for here is the beer at the pump to be exactly the same as the beer we sampled from the cask.

If you encounter any problems at this stage, check the troubleshooting section through the link below, or please get in contact with the brewery and one of our fully trained representatives will be in touch to troubleshoot any issues you are having.

At the end of each trading session remember to close the valve until the next trading session.

Troubleshooting

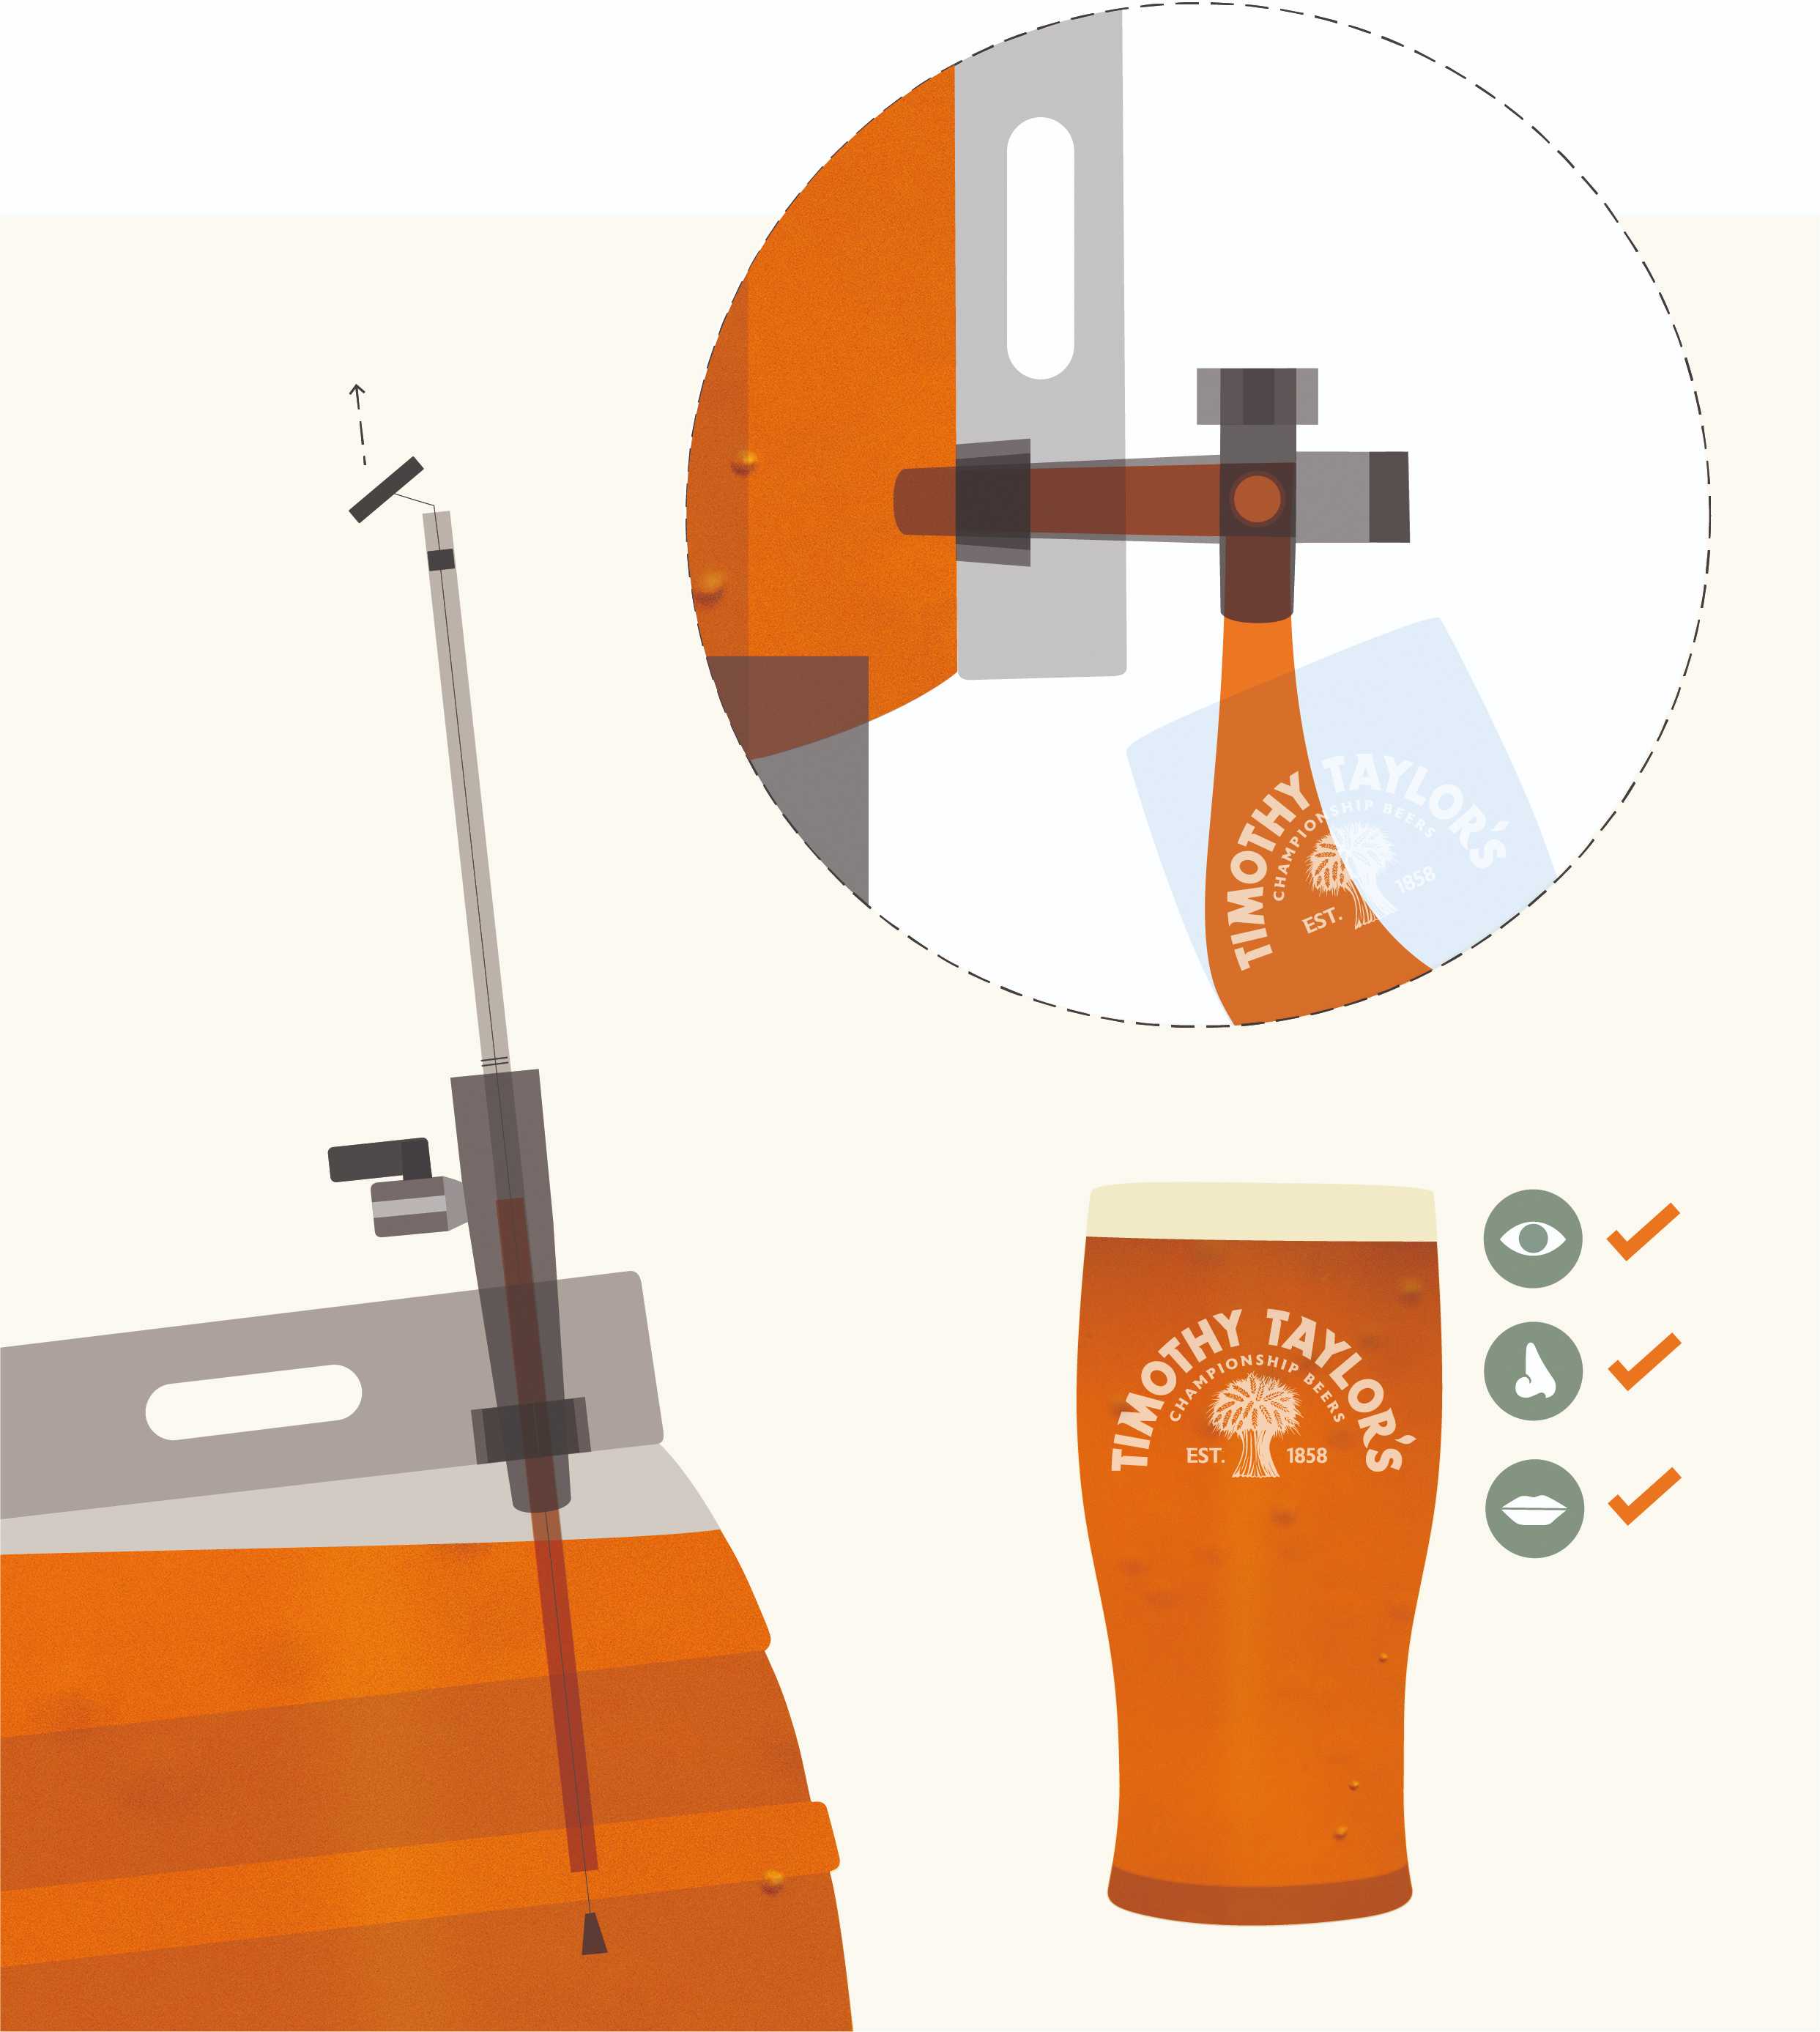
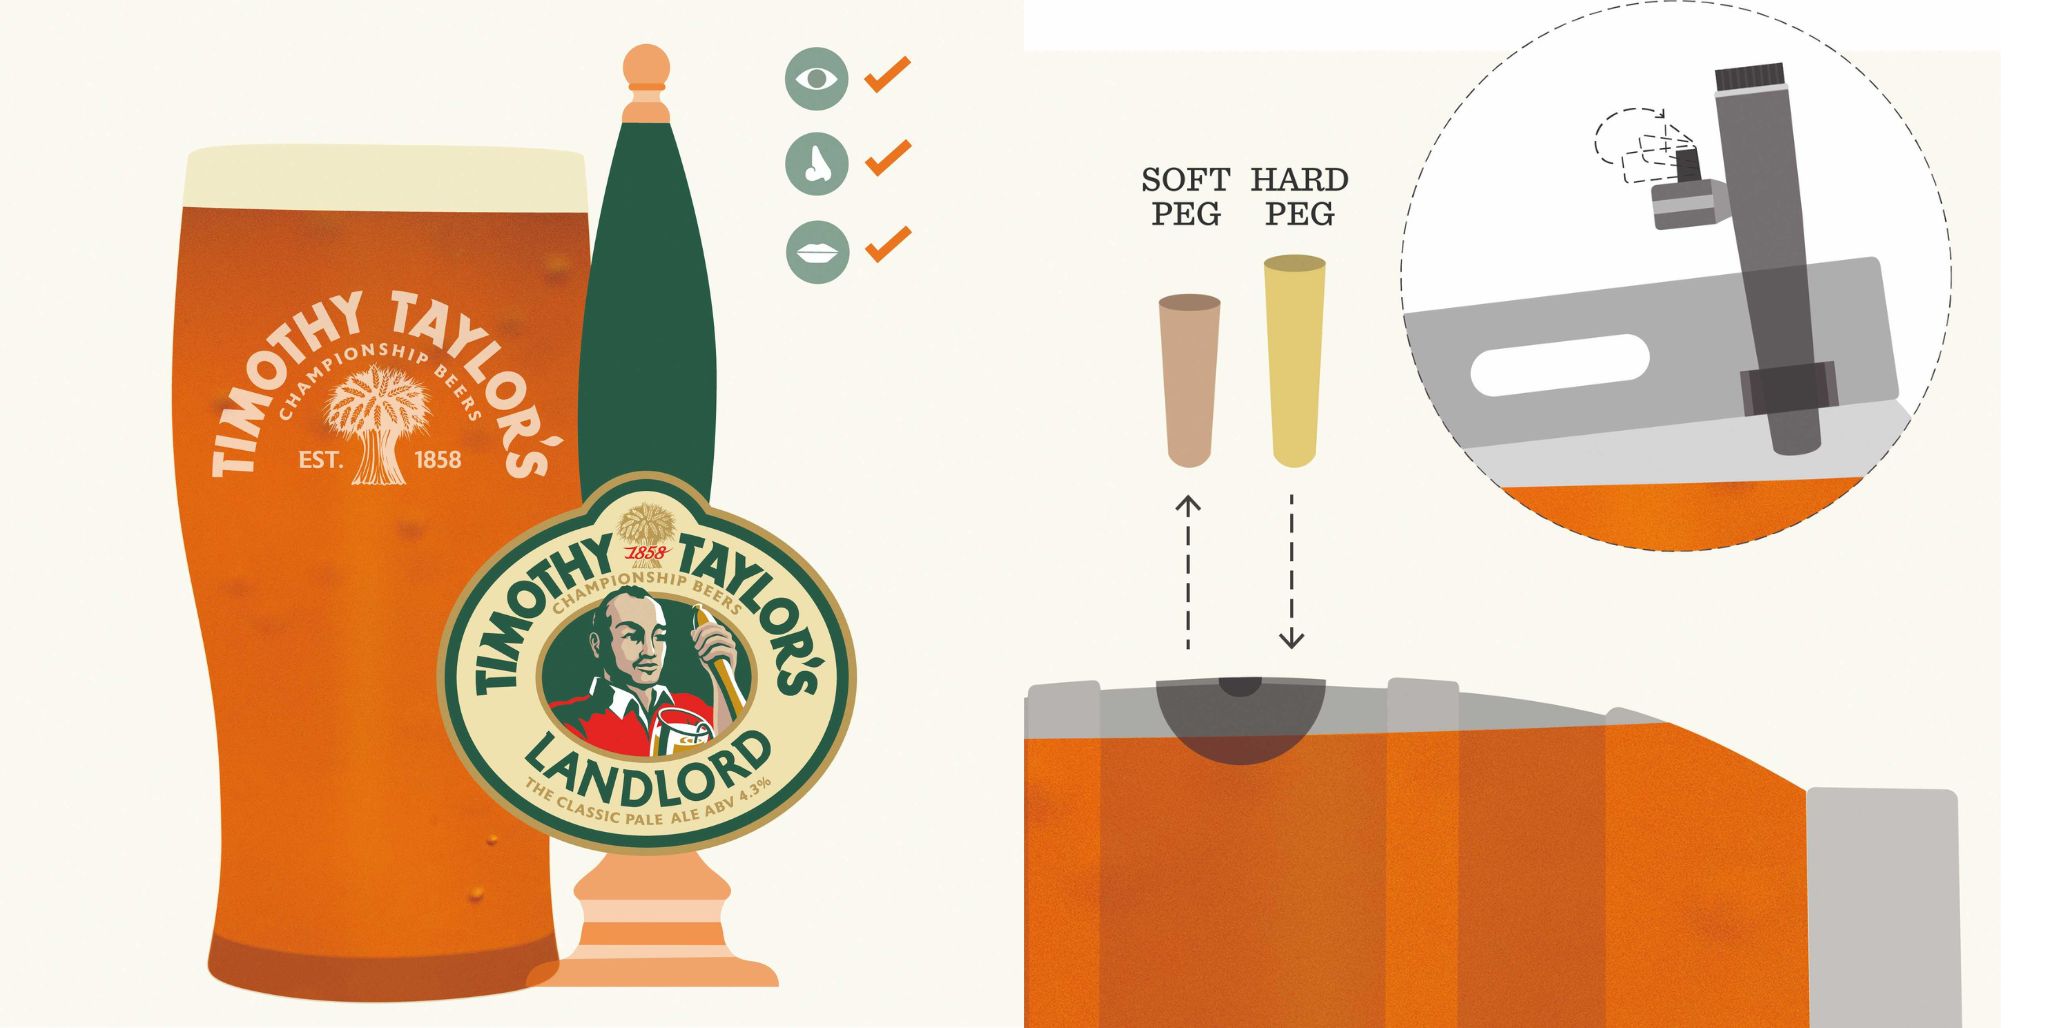
No beer coming out of the pump, beer is hazy, beer is flat? Fear not, we've put together a list of the most frequently experienced issues in pubs, with handy tips to help solve any problem.

TROUBLESHOOTING

Cask Care Introduction

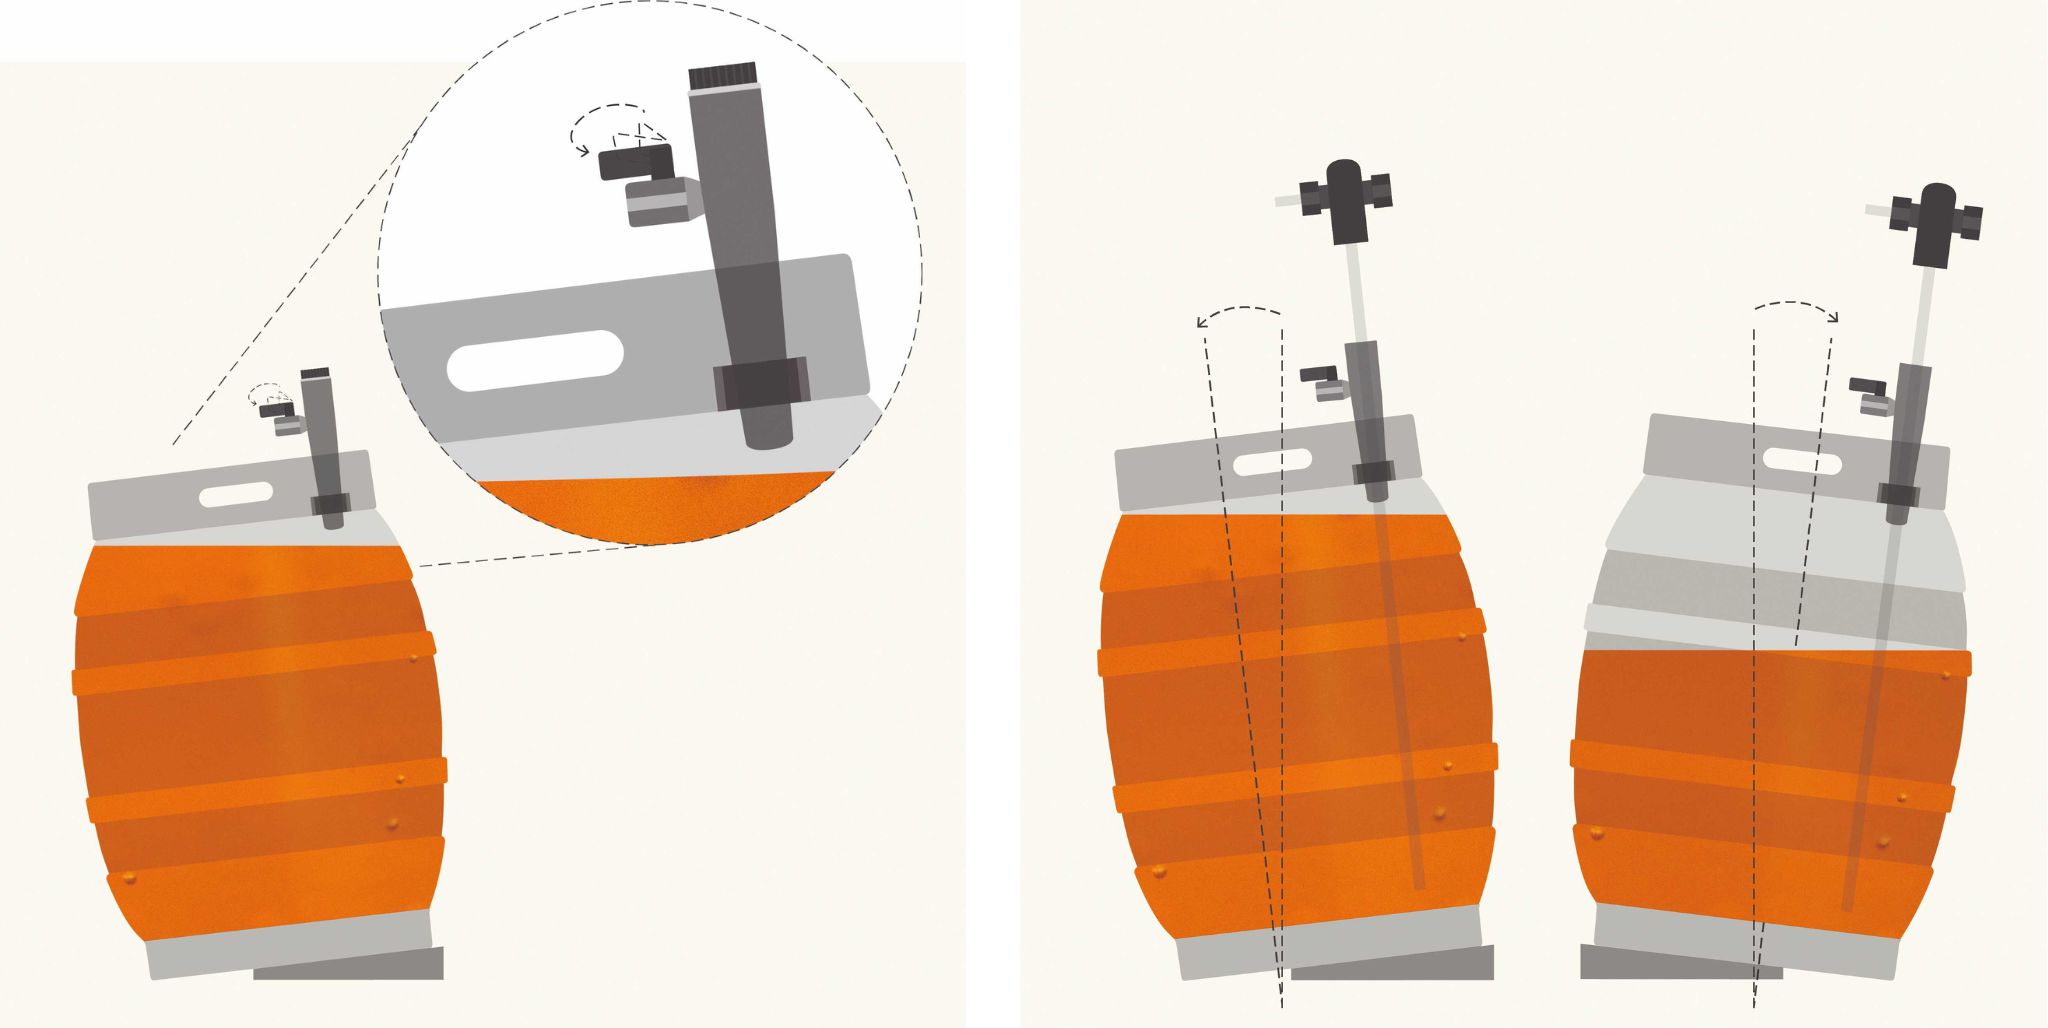
Learn more about the importance of cask conditioning, cellar hygiene, the Three Day Rule, cellar temperature, and the anatomy of a cask.

LEARN MORE ABOUT CASK CARE

Download Our Cask Care Brochure

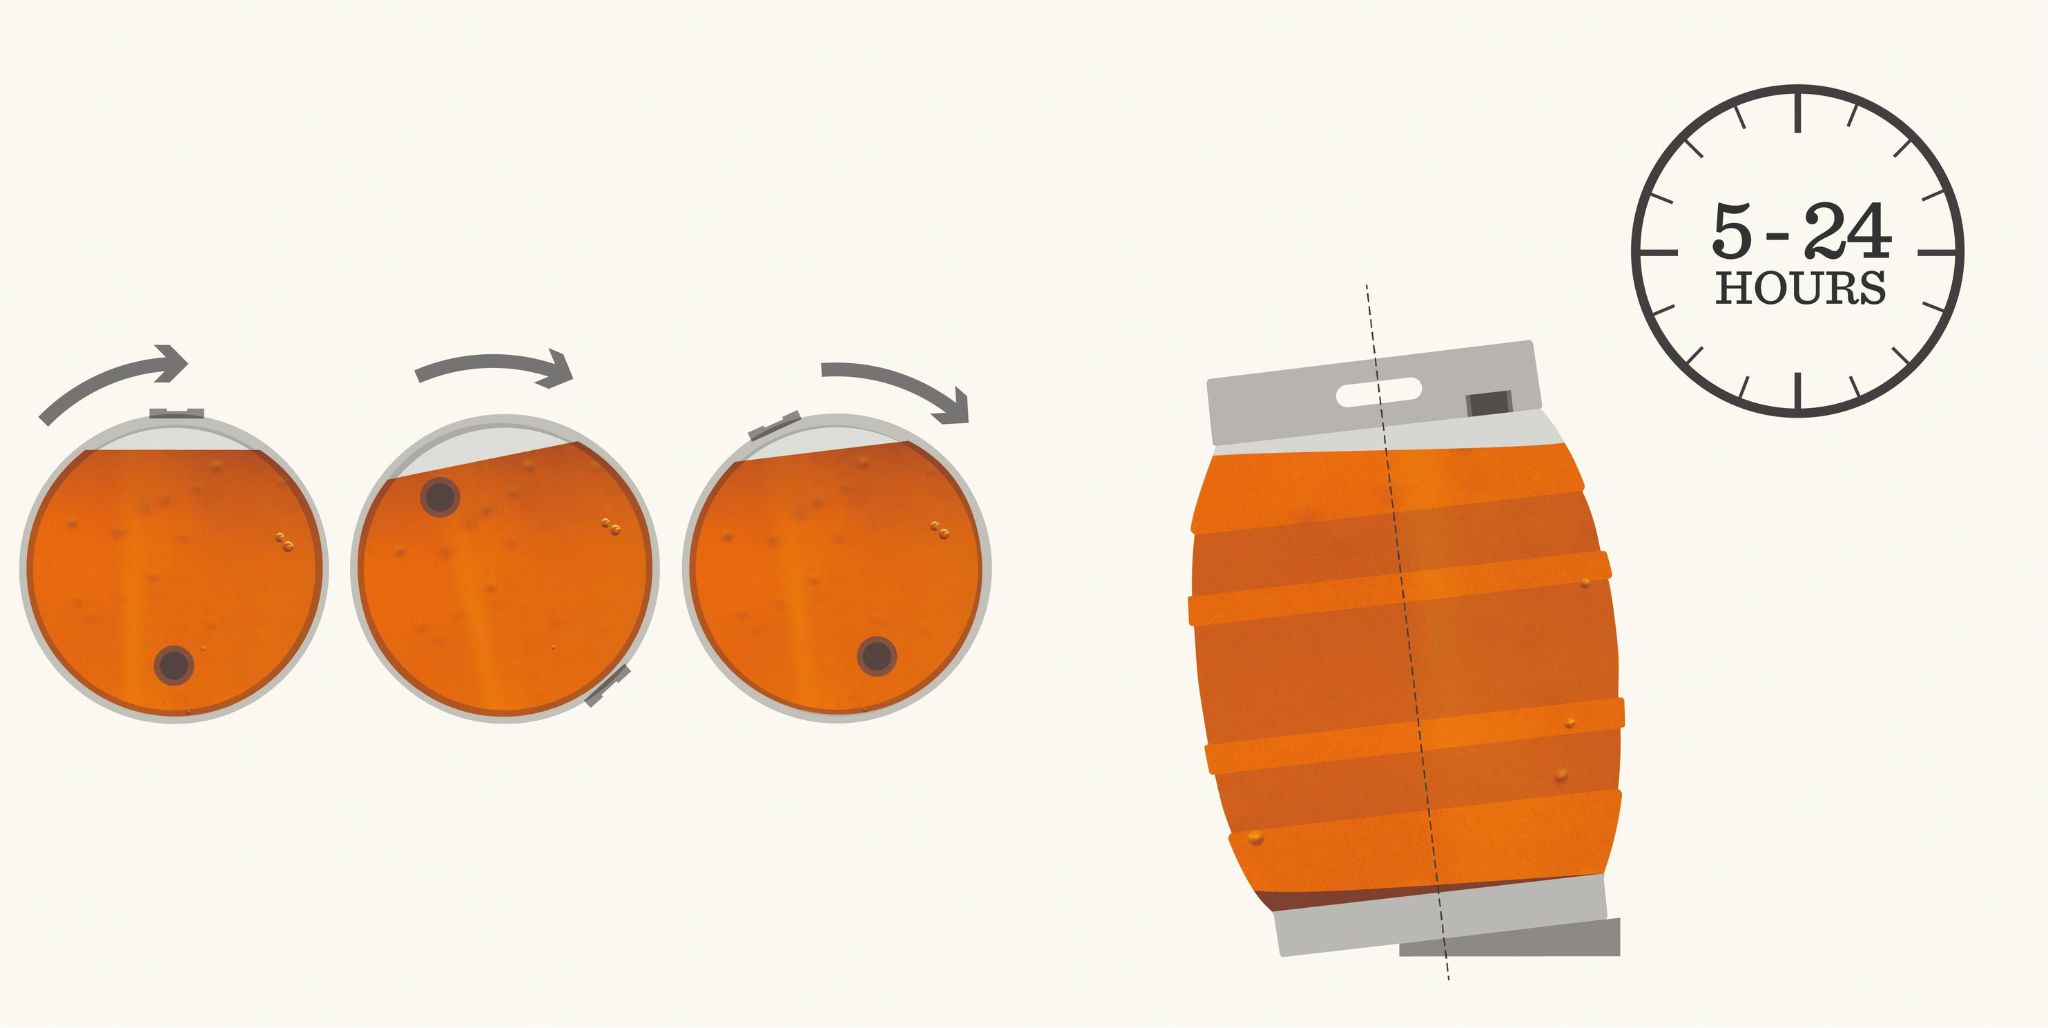
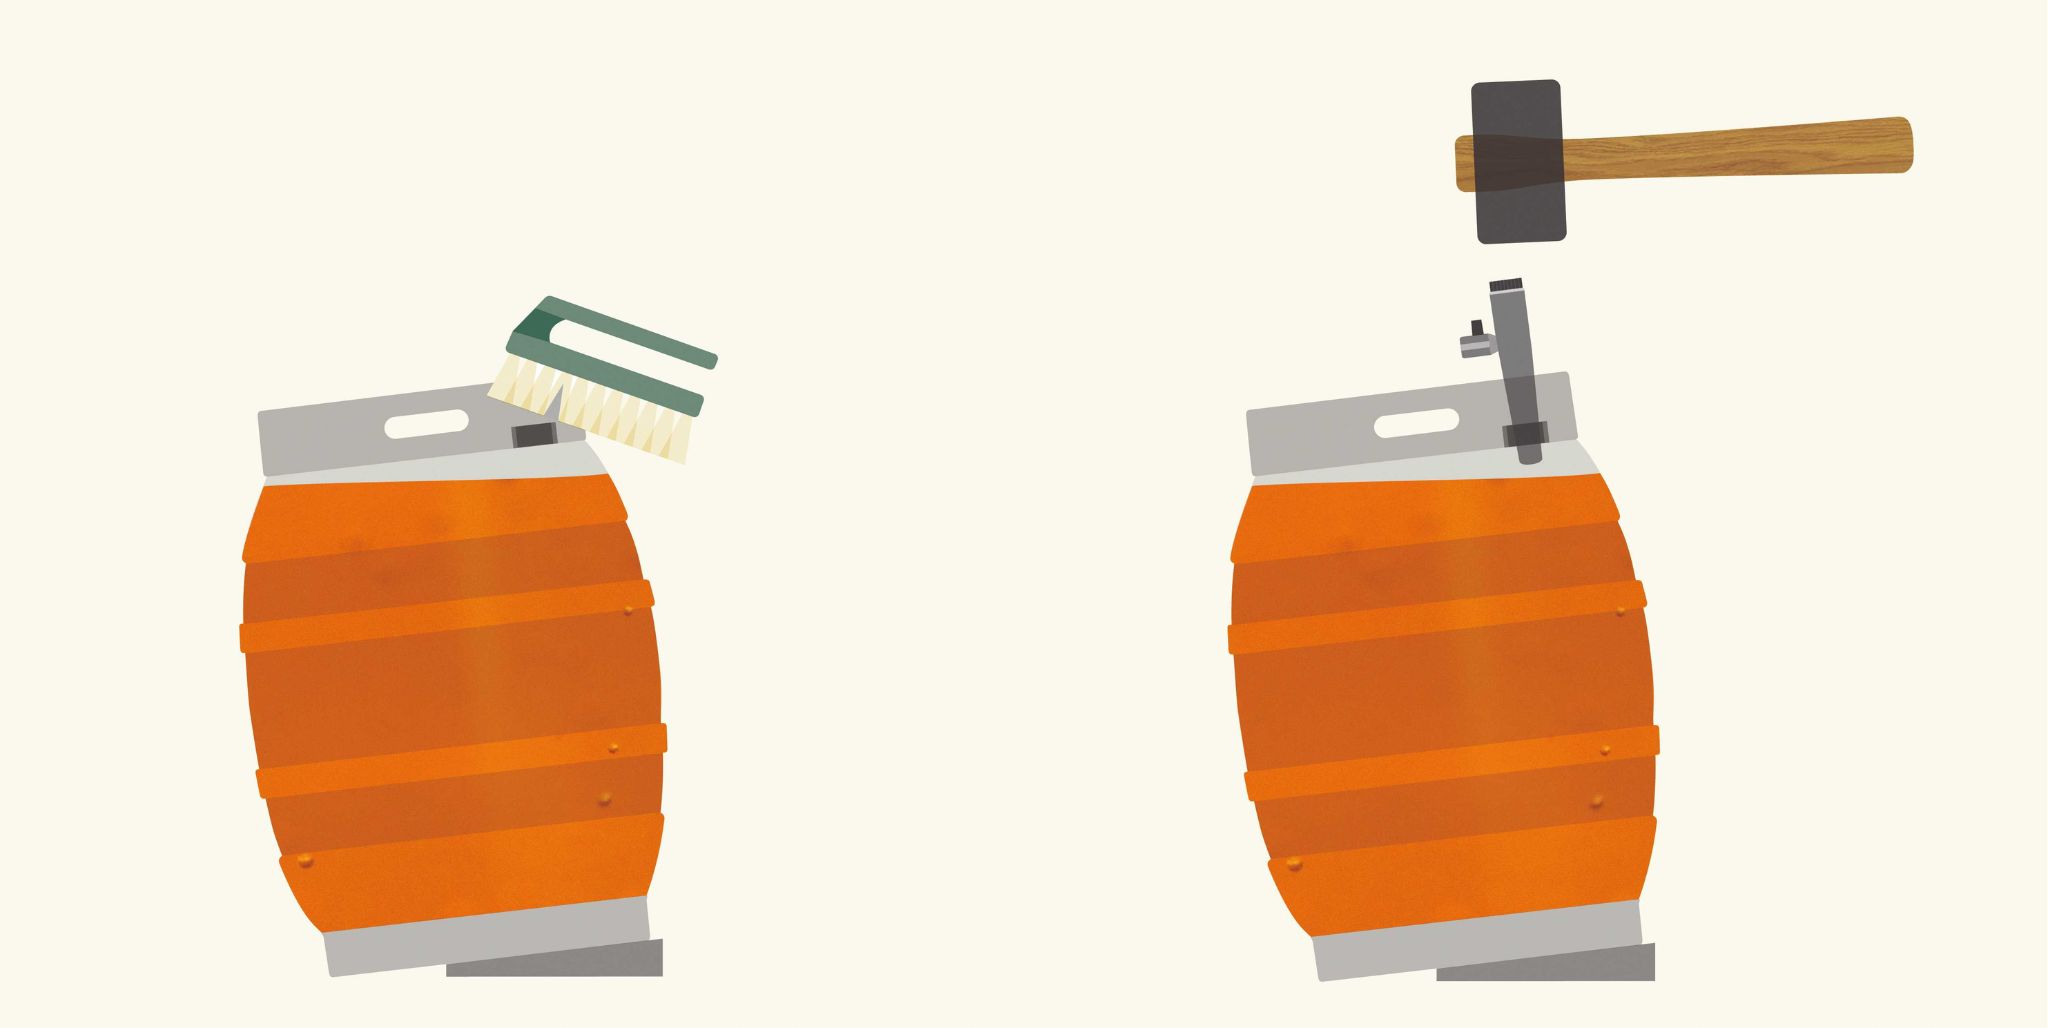
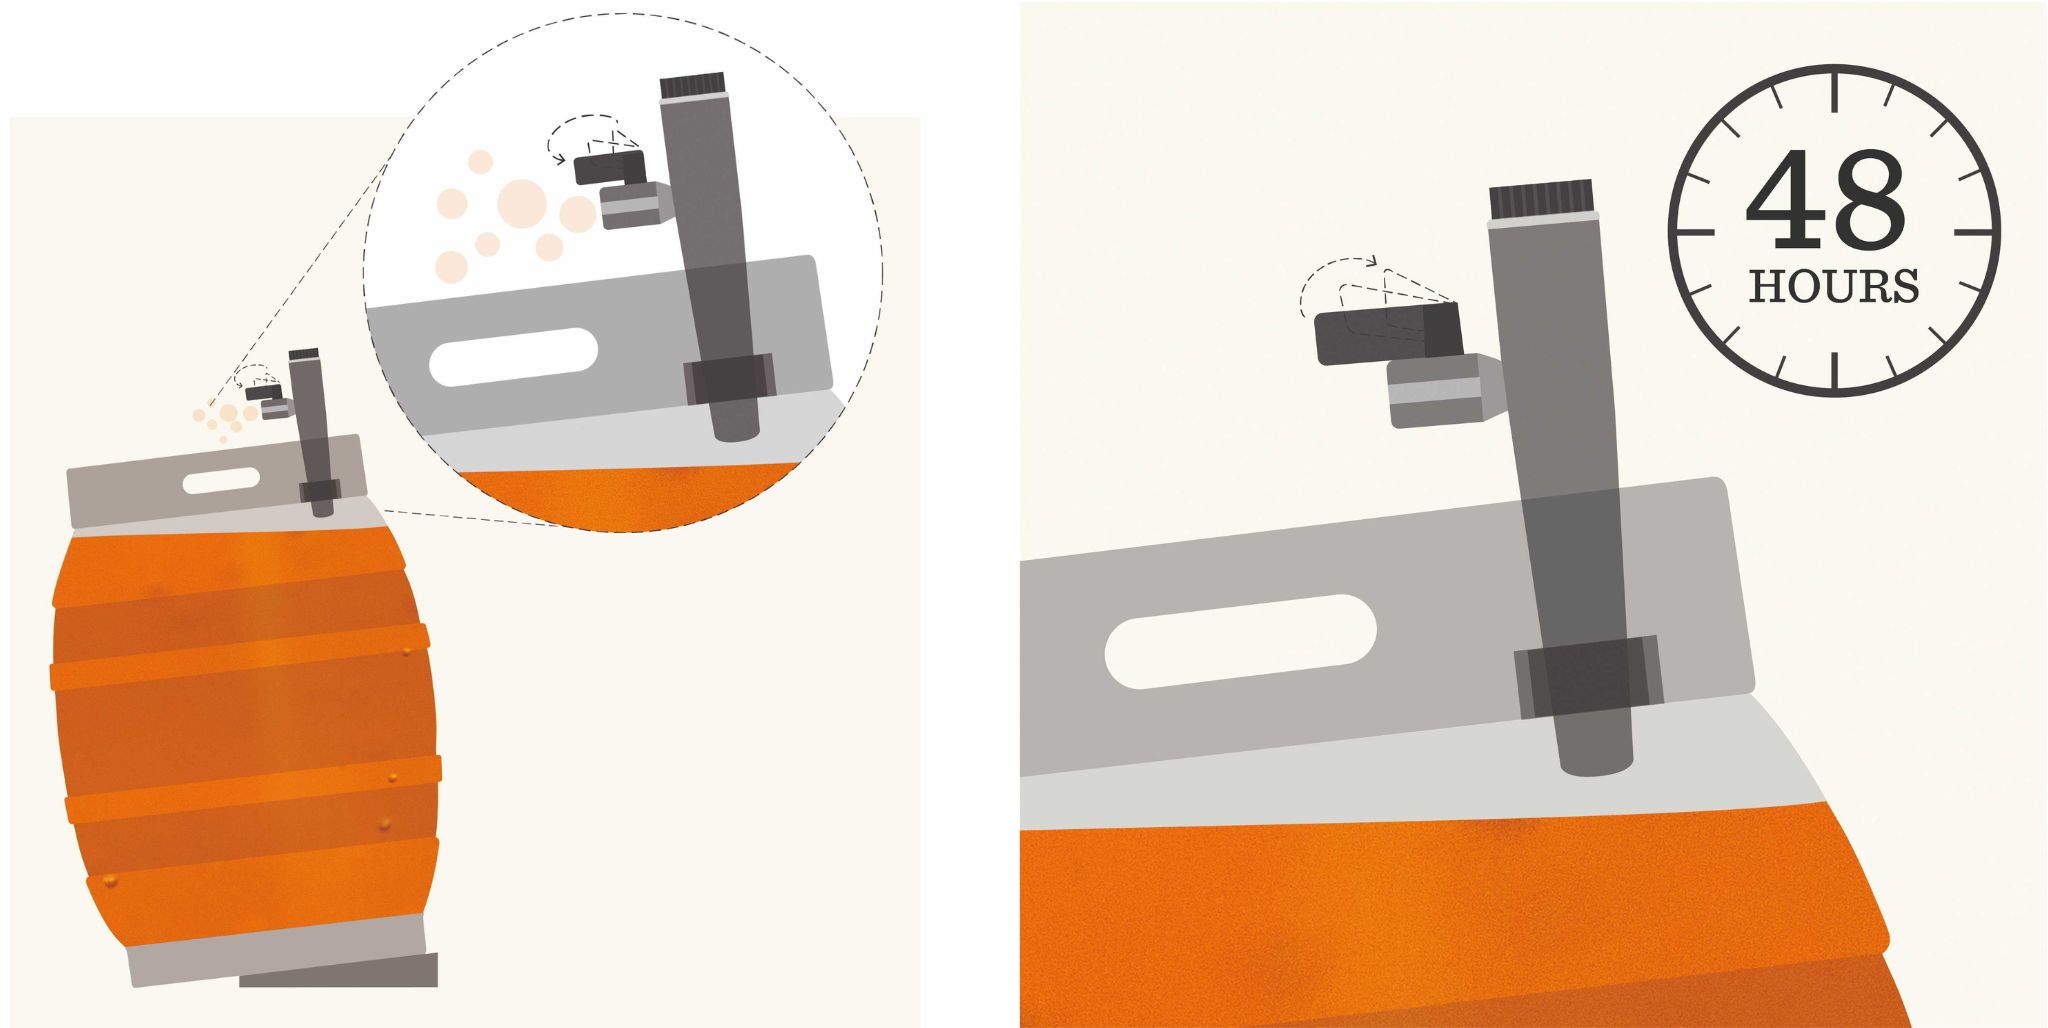
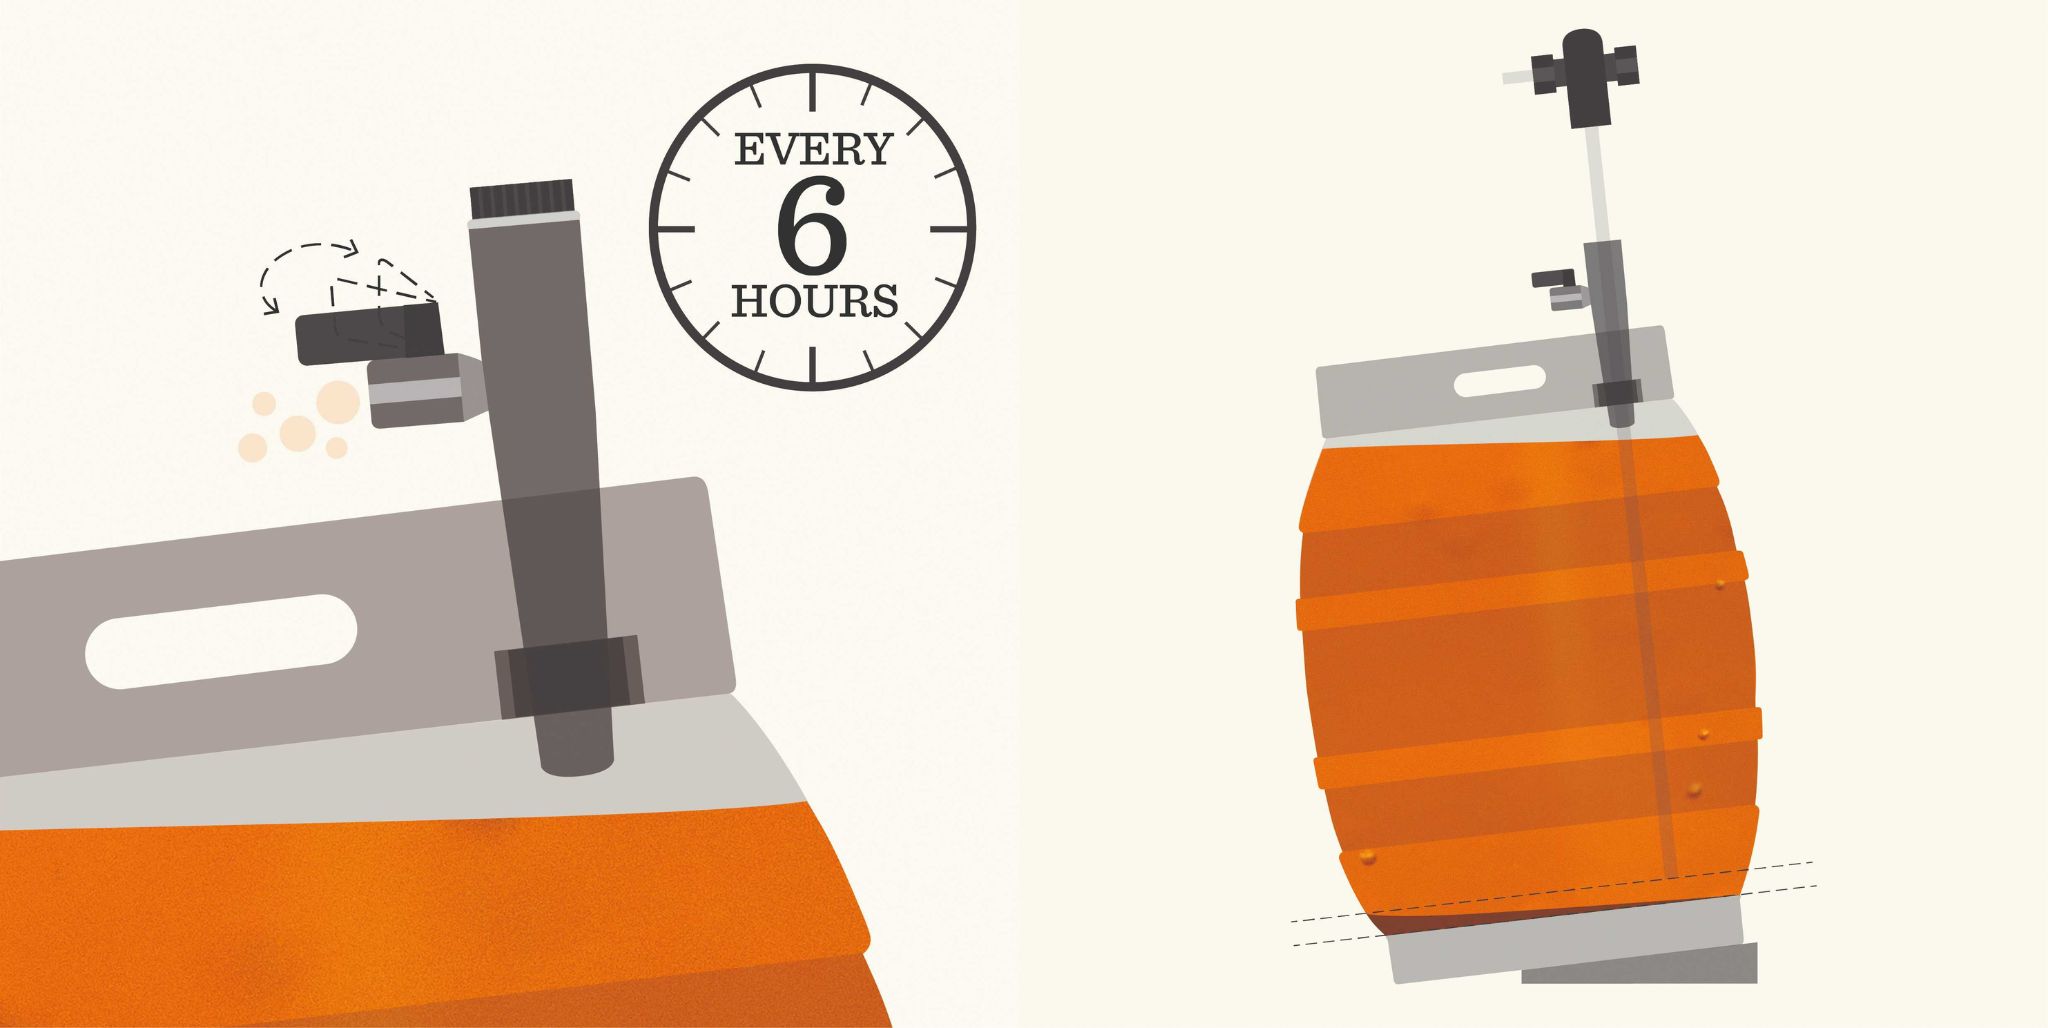
We know we can’t be on hand every time so we’ve put together this guide as a handy reminder of the steps to follow to ensure your pub can always deliver the perfect pint of Taylor’s for your customers.

DOWNLOAD OUR CASK CARE BROCHURE

Timed popup